Tileset Debugger
Added in version 3.0-alpha6.
The Tileset Debugger, accessible from the Game menu, lets you inspect how the map is drawn. This is very helpful when developing a tileset, to understand why something is rendering incorrectly or to understand how other tilesets work. The debugger window contains two tabs: Messages and Inspector. They are documented below.
Attention
The Tileset Debugger is still a work in progress. If you have suggestions regarding its contents and functionality, you are very welcome to let us know on GitHub — you will get a chance to shape it to your needs.
Changed in version 3.0-beta1: Added messages.
Messages
When loading at tileset, Freeciv21 will emit messages for sprites it cannot find or other errors. The Messages panel displays the messages for the current tileset. They are grouped in three categories, indicated by a small icon: information, warning and error messages. Errors are the most important: they indicate that something went seriously wrong when loading the tileset, and you should check it. Warnings are emitted for instance when the configuration is likely incorrect, or a feature in use will change in a future version. They may also help understand what caused an error. Information messages may give tips or provide context about the steps involved in loading a ruleset, and can usually be ignored.
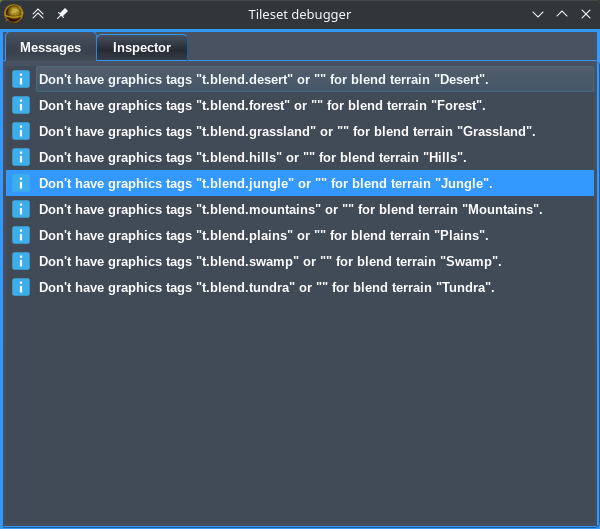
Fig. 89 The Tileset Debugger showing information messages from a successfully loaded tileset.
Inspector
The inspector can break out a tile into the basic sprites used to draw it. Start by clicking on the Pick tile button and then somewhere on the map. The window will be updated with the list of sprites used to draw the selected tile:
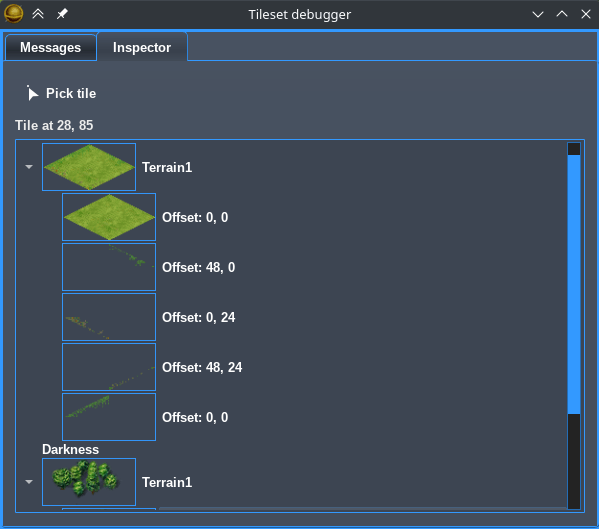
Fig. 90 The Tileset Debugger with a forest tile picked up.
The list has two levels. Each top level item corresponds to one layer used to draw the map. When something is drawn for a layer, its image is added next to its name and the individual sprites are added in the second level. The sprites at the top of the list are drawn first and are hidden by the ones below. Note that at the moment, only sprites that correspond to the tile (as opposed to its corners and edges) are visible.
In the picture above, which uses the amplio2 tileset, three layers of a forest tile are shown, two of which
have sprites: a terrain layer (Terrain1), Darkness, and another terrain layer (also listed as
Terrain1). The first terrain layer is made of five sprites: one for the base texture and four that blend
it with adjacent tiles. The second terrain layer has only one sprite, used to draw the trees.
The offsets used to draw the sprites are also shown. The first number corresponds to the horizontal axis and
runs from left to right. The second corresponds to the vertical axis that runs from top to bottom. Depending
on the type of layer, these values may be computed automatically, so they do not necessarily correspond to
parameters in the tilespec file.