Visual Studio for Windows
Note
As of July 2026 we are no longer fully supporting Visual Studio and are instead supporting VS Code as our preferred IDE. You can get instructions from Set up a Development Environment. This page is no longer maintained and left as reference for those that wish to use Visual Studio.
Freeciv21 can be compiled using Microsoft Visual Studio® and clang-cl. This page will help you
get version 2022 up and running.
Warning
Visual Studio and the corresponding dependencies require a great deal of HDD space on your computer. Be sure to have at least 80GB of available space before starting this process.
Base Installation
Start by downloading the Community Edition installer from https://visualstudio.microsoft.com/vs/community.
Double-click the VisualStudioSetup.exe file in your Downloads folder and follow the prompts to get the
setup process started. At some point you will be prompted to select the type of workload you want to
install. Select Python Development and Desktop development with C++. On the right
panel, under Installation Details, uncheck vcpkg package manager and check
Windows 10 SDK 10.0.20348.0).
Note
We remove the vcpkg package manager inside of Visual Studio in order to install one that is better
managed and easily updated later down this page.
Next click on the Individual Components tab and select the following options: Git for Windows, C++ Clang Compiler for Windows (17.0.3), and MSBuild support for LLVM (clang-cl) toolset.
When ready click Install. Depending on your Internet connection speed, this may take a while. There is a Start after installation check box that you can uncheck as we do not need to open Visual Studio post installation.
When the installation process is finished you may close the installer.
Install Python
Freeciv21 development needs access to a Python Interpreter. We also need Python for the git clang-format
command used as part of adding a pull request to our GitHub repository.
Right-click the Start Menu and either open an Admin level PowerShell or Terminal depending on the version of Windows you have installed. From now on we will refer to this as the Terminal.
From the prompt enter python and press enter. Windows should open the Windows App Store to Python 3.x (as
of this writing its 3.12). Click Get to install it. Once the installation is finished, you can
close the Windows App Store and return to the Terminal. Enter python a second time and you should now get
a python interpreter like below. You can type quit() to exit the interpreter.
PS C:\> python
Python 3.12.2 (tags/v3.12.2:6abddd9, Feb  6 2024, 21:26:36) [MSC v.1937 64 bit (AMD64)] on win32
Type "help", "copyright", "credits" or "license" for more information.
>>>
Set Up VCPKG
vcpkg is a library package manager developed by Microsoft. It makes downloading and installing
third-party libraries much easier. Freeciv21 uses vcpkg in this way via the manifest file
vcpkg.json. Documentation is available here: https://github.com/microsoft/vcpkg
First, create a directory on your computer to install vcpkg into. For example: C:\Tools.
The directory can be anywhere, however the author prefers to not install things in the root of the
C:\ drive.
In the Terminal window change to the directory.
PS C:\Windows\System32> cd c:\tools
PS C:\Tools>
Follow these steps to install vcpkg. The setx command should be altered to be the correct path
that you installed vcpkg into. The forward slashes are correct.
Tools> git clone https://github.com/microsoft/vcpkg
Tools> .\vcpkg\bootstrap-vcpkg.bat
Tools> setx VCPKG_ROOT C:/Tools/vcpkg /M
Tools> exit
Warning
The vcpkg website/readme will ask for you to run a vcpkg integrate install command to fully
integrate all the packages installed into Visual Studio. Do Not run this command as it actually
breaks Visual Studio’s ability to find and use the clang-cl compiler, which we need.
GitHub
The Longturn.net Community uses the online source code control and revision system known as GitHub. To contribute, you will need an account on this platform. There is no cost.
With an account, you can go to the Longturn community repository page and fork a repository (such as the Freeciv21 repository) to your personal GitHub account. Go to the main page of the repository you want to fork and you will find a fork button in the upper-right corner.
In order to get code pushed to the forked repository to your local workstation, you need to setup an SSH key pair to share with GitHub. Follow these instructions.
With SSH set up, now it is time to clone the forked repository from your personal GitHub account to a local copy on your workstation. You can get the appropriate path by going to your forked copy in a browser, click the code button and then select the SSH option as shown in this sample screenshot:
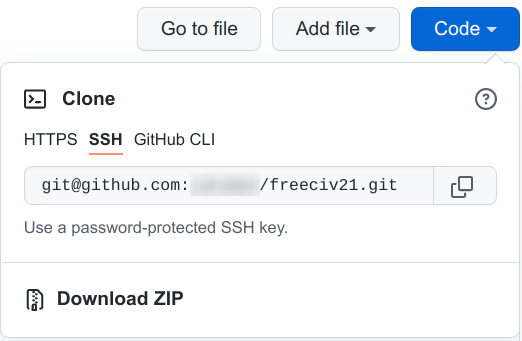
Fig. 94 GitHub Clone SSH
Open up Visual Studio. A menu will appear. Go to the very bottom right and click the link to continue without code. Select to open a terminal in the IDE if one is not already shown at the bottom. Once you have the proper GitHub path, here is the command to clone the repository:
PS C:\Users\[user]\Source\Repos> git clone git@github.com:[username]/freeciv21.git
This will clone the forked repository to the C:\Users\[User]\Source\Repos\freeciv21 directory on
your computer.
The final repository setup item is to link the original Longturn project repository to your local area on your computer:
Repos> cd freeciv21
Repos\freeciv21> git remote add upstream https://github.com/longturn/freeciv21.git
Repos\freeciv21> git fetch upstream
Repos\freeciv21> git pull upstream master
You will also need to set a couple global configuration settings so git knows a bit more about you.
freeciv21> git config --global user.email "[email address associated with GitHub]"
freeciv21> git config --global user.name "[your first and last name]"
Build Visual Studio Solution
Now let us get Visual Studio set up. Select
and then select the freeciv21 folder. Visual Studio will take a minute to parse the source tree.
Select . Select the freeciv21 directory and then Visual
Studio will parse the files in there. It can take a few minutes for this to complete. When complete, Visual
Studio will open a CMake Overview Pages tab.
Microsoft provides documentation on CMake in Visual Studio – https://docs.microsoft.com/en-us/cpp/build/cmake-projects-in-visual-studio?view=msvc-170
Qt Visual Studio Tools
There is an available extension called Qt Visual Studio Tools. This extension allows you to use the
Qt Designer and other Qt tools within the Visual Studio IDE. This is especially useful if you want to edit
any of the client .ui files.
Start by downloading the installer.
Double-click the downloaded file and login with your Qt account. If you do not have a Qt account, there should be a link in the installer window to create one.
Click Next, agree to the GNU License and state that you are an individual, not a business.
Click Next and pick to either send or not send usage statistics to Qt.
Click Next. Note that installing to
C:\Qtis fine.Ensure Custom Install is selected and then click Next.
On the right, uncheck latest supported release and check Archive, click Filter.
Expand Qt and check the
5.15.2option.Click Next and agree to the Microsoft license.
Click Next and note that Qt for the Start Menu is fine.
Click Next and Install to begin the process.
Note
You can reduce the size of the Qt Tools install by expanding the 5.15.2 option and unchecking
WebAssembly, MSVC 2015 64-bit, MSVC 2019 32-bit, MinGW 8.1.0 32-bit, MinGW 8.1.0 64-bit,
UWP*, and Android. Unless you intend to develop for those platforms, you do not need to download and
install those components for Freeciv21.
To install the extension. In Visual Studio, click on . Search for Qt Visual Studio Tools and install it.
To set the version of Qt in the extension’s options. Click on
. Add version 5.15 and in the path enter:
C:\Qt\5.15.2\msvc2019_64\bin.
Final Steps and Notes
At this point Visual Studio is ready for you to configure, compile (build), and install Freeciv21.
To configure Freeciv21 in Visual Studio you first have to select either the windows-release or
windows-debug configuration preset as defined in CMakePresets.json. On the
Standard toolbar, which is enabled by default, you will click the Target System drop
down box and pick the Local Machine option. Next you will click the Configuration drop
down box and pick the windows-release or windows-debug option (debug is preferred for
development).
With these options set you will lastly click . When this process
is complete you can then compile (build) by clicking . Visual Studio will
compile all targets for Freeciv21 and place the output into the build-vs directory. If you want to
install Freeciv21 to test any work you are doing, you can go to .
When complete, you should find a fully functional install in the build-vs/install directory.
Note
The preferred Configuration is debug-windows, especially if you want to
troubleshoot code with the built-in debugger and also if you plan to use the unit test feature CTest.
Note
The first time you run the Configure Cache command (from ) or
ask Visual Studio to generate the C++ Intellisense data, Visual Studio will invoke the vcpkg
installation process to download and compile all of the project dependencies listed in the manifest file:
vcpkg.json. This will take a very long time. On a fast computer with a good Internet
connection it will take at least 3 hours to complete. Everything will be downloaded and compiled into the
C:\Tools\vcpkg directory, or wherever you configured vcpkg earlier. Binaries for the
packages will be copied into the ./build-vs/ directory inside of the main Freeciv21 directory and
reused for subsequent builds.
Attention
As documented in Compiling Freeciv21, there is a --target package option available to build an
installable package for Windows. This is only available to the MSYS2 environment. This does not mean that
you can not test an install using Visual Studio. After going to
you can still manually start up the client or a server as needed to debug. To do this you will start up
either the client, the server, or both and then in Visual Studio go to
.
Notes about Clang-Cl vs MSVC
Freeciv21 has two custom presets specifically for Windows and Visual Studio because Visual Studio defaults to the MSVC compiler instead of LLVM’s Clang-Cl compiler that we installed earlier. The main reason why we do this is because the code requires proprietary extensions that MSVC does not implement. Instead the Longturn community supports the open source LLVM Clang-Cl compiler on Windows in Visual Studio as it supports the required proprietary extensions (note that GNU GCC is used in MSYS2 on Windows). If you select any preset and allow Visual Studio to configure with the Ninja generator and MSVC compiler you will receive a great number of errors and the build will fail.
If you are interested in configuring and compiling from the command line instead of the GUI, you can use these commands:
cmake --preset windows-debug -S . -B build-vs
cmake --build build-vs --target install
The first command configures Visual Studio to compile a Debug version of the programs and places the install
location to be a sub-directory of the build-vs directory for use during debugging and testing
purposes. This is the same as selecting the windows-debug preset configuration. The second and third
command then “builds” and “installs” the configured code solution. You will need to manually start the client
and/or server to test.